Side Table Kit (Small)
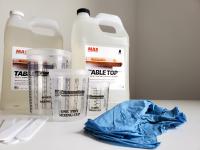
Table Mold Starter Kit with Epoxy and Accessories
This 16x12” reusable mold is the perfect size for a small end table or art piece, making it both versatile and convenient! This kit comes complete* with all of the material basics for your project – all you need to worry about are the colors you want (we can help!) and what type of wood you’re going to use. Head over to our Colorants page to see what options we have available for you!
Did you know that your new mold also doubles as a level pouring surface? Well you do now! Covering the top opening of the mold (while it’s in use, or while it isn’t) with a panel or board opens up a whole new pouring area for you. Is your project unmolded already? Great – use the inside of your mold as a walled pouring area! This is great news for anyone who is limited to a smaller work space, but still wants to be able to use a deep pour resin since they typically take longer to cure!
*Please note that Paste Wax is recommended for the clear face plate of your mold, as well as a heat tool of some sort for bubbles, but will need to be purchased separately.*
Tips & Tricks About Your Kit
Carefully put your mold together, being mindful not to strip any screws – extras are provided but this will help to avoid any headaches!
Wax your clear face plate with Paste Finishing Wax (Minwax, Varathane Paste Wax, etc) and give it adequate time to dry. This will help ensure that your epoxy does not stick to the clear face plate. You can apply generously as long as you allow it to dry fully
Pushing silicone into the grooves with a gloved finger or a reusable stir stick will help make sure your seal is tight, meaning no epoxy is going to leak out of your mold
Allow adequate time for the silicone to cure prior to pouring your resin – just like how you would not take your project out of the mold half cured
Mix your resin slowly, but thoroughly – if you plan on using a drill attachment to mix your resin due to the volume required, please be mindful that this will add bubbles. You’ll want to have a heat source, like a heat gun or larger scale butane/propane torch handy to remove air bubbles while the resin degases
Use your reusable stir sticks to create swirl patterns with your preferred colorant during the curing process
You can clean off your stir sticks and gloves with baby wipes or a cloth/paper towel coated in 91-99% isopropyl alcohol if you’d like to use them again
What's Included?
| Product Name | SKU | Quantity |
|---|---|---|
| MAS Deep Pour Epoxy Resin | MAS-DP-1Q | 2 |
| Small Table Mold | RM-SMALL-TABLE | 1 |
| Dividers - Small Table Set | RM-ST-SET | 1 |
| Medium Nitrile Gloves | RA-03 | 1 |
| 1/2 Pint Mixing Cup | RA-C40 | 1 |
| Reusable Mixing Sticks | RA-01 | 1 |
| AKFix 100S Kitchen and Bath Silicone | WT-100S | 1 |



 Add to Cart


 Cart
Cart